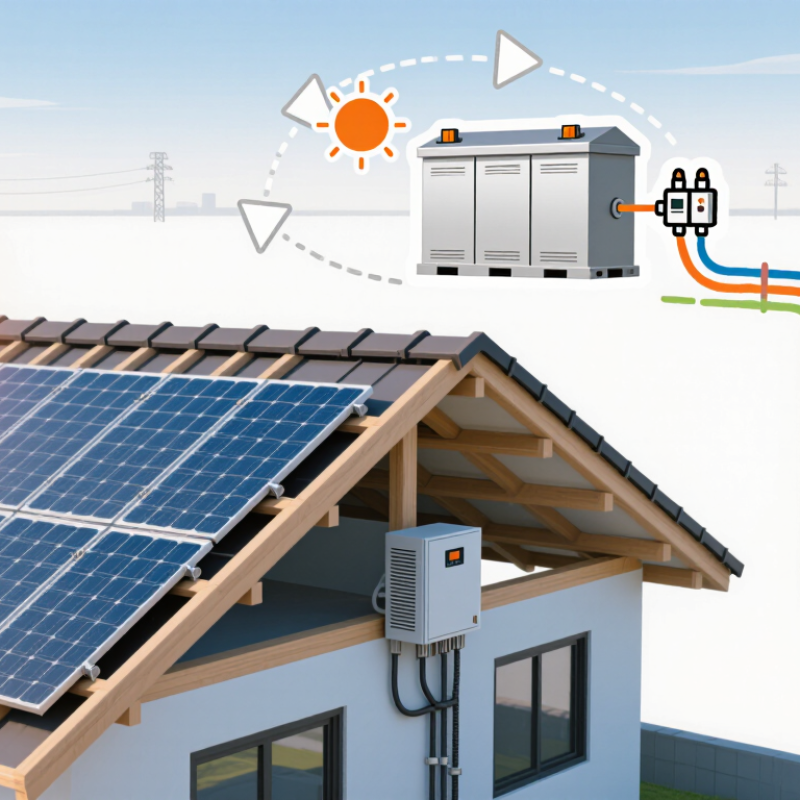
How to Design the Best Solar Panel and Inverter System?

Time:2026-10-23 Author:Sienna
0%

Solar power is moving from a niche technology into a central part of modern electricity planning. The International Energy Agency reported that global renewable capacity additions reached nearly 510 gigawatts in 2023, with solar photovoltaic systems providing most of that growth. IRENA’s Renewable Capacity Statistics 2024 recorded approximately 1.42 terawatts of installed global solar capacity by the end of 2023. These figures show strong momentum, but scale alone does not guarantee a reliable system.

A well-designed installation must connect solar modules, inverters, batteries, protection devices, and local electricity demand. The real question is not simply how many panels fit on a roof. It is how production changes across seasons, temperatures, shading conditions, and household consumption patterns. This is where “How to design a photovoltaic system with solar panels and inverters” becomes a practical engineering question. NREL’s PVWatts tools demonstrate why location, tilt, azimuth, system losses, and inverter efficiency can materially change annual output. Small assumptions matter.

This guide examines those decisions through measurable design principles and field-based considerations. It considers module voltage, inverter clipping, maximum power-point tracking, cable losses, and future expansion. IEC 62548 and IEC 62109 provide useful international references for photovoltaic array design and inverter safety. Yet no report can replace a site survey. Roof structure, utility rules, emergency access, and local weather may challenge an otherwise attractive calculation. That is worth admitting. A spreadsheet can look precise while hiding weak inputs. The best system therefore balances energy yield, safety, maintainability, lifecycle cost, and realistic user behavior—not only the highest rated capacity.

How to Design the Best Solar Panel and Inverter System?

Define Your Solar Energy Goals and Site Conditions

Designing a strong solar panel and inverter system begins with clear energy goals. Are you reducing monthly bills, preparing for outages, or powering a future electric vehicle? Review twelve months of electricity bills, not just one summer statement. Note your highest daily usage and major loads, such as pumps, heating equipment, and kitchen appliances. A modest target may require fewer panels and a smaller inverter.

Your site conditions matter just as much. Record roof direction, pitch, usable area, and shading from trees, chimneys, or nearby buildings. A shadow across one panel at 3 p.m. can reduce more energy than expected. Check the roof’s age and structure before installation. It may be wiser to repair an aging roof first. Measure the distance between the array, inverter, and electrical panel, because long cable runs can increase losses and installation costs.

A professional site assessment should verify voltage, grounding, mounting loads, and local connection requirements. In practice, early estimates can be too optimistic. Weather, dust, and seasonal shadows change performance. I would leave some design margin instead of sizing the system exactly to today’s usage. Your household may grow. That detail is easy to overlook.

How to Design the Best Solar Panel and Inverter System? – Define Your Solar Energy Goals and Site Conditions

Use the following planning matrix to match energy goals, site conditions, photovoltaic capacity, inverter selection, and battery requirements before requesting a detailed engineering design.

Solar Energy Goal Typical Electricity Use Recommended PV System Size Suitable Inverter Configuration Battery Storage Guidance Preferred Site Conditions Important Design Considerations
Reduce daytime electricity bills Approximately 8–15 kWh per day, with major loads operating between 9:00 and 17:00 Approximately 3–5 kW of solar capacity, depending on local sunlight and annual consumption Grid-connected string inverter; a DC-to-AC ratio of approximately 1.1–1.3 can improve morning and afternoon production Usually optional; consider 5–10 kWh of usable storage if evening consumption is significant Unshaded roof or ground area with approximately 15°–40° of tilt and good access for maintenance Prioritize direct use of solar power. Shift water heating, washing, and charging loads to daylight hours where possible.
Maximize annual bill savings Approximately 15–30 kWh per day with moderate or high annual consumption Approximately 5–10 kW, subject to roof area, electrical limits, and local grid rules Three-phase or single-phase inverter selected according to the property supply; multiple MPPT inputs are useful for different roof orientations Approximately 10–20 kWh of usable storage when export rates are low or evening demand is high Minimal shading during the main solar window, preferably from 9:00 to 15:00 throughout the year Compare annual generation with annual consumption rather than sizing only from the highest monthly bill. Include seasonal demand changes.
Increase energy independence Approximately 15–35 kWh per day, including evening and overnight loads Approximately 6–12 kW, often larger than a bill-reduction system to support battery charging Hybrid inverter with grid connection, battery charging capability, and managed backup output Approximately 15–30 kWh of usable storage; reserve 10%–20% for emergency operation Large, mostly unshaded array area with reliable solar exposure during winter months Battery capacity must be checked against both daily energy demand and peak power. High-power appliances may require load management.
Provide backup during grid outages Critical loads commonly include refrigeration, lighting, communications, internet equipment, and selected medical devices Approximately 3–8 kW, depending on the critical-load demand and desired recharge speed Hybrid or battery-based inverter with a dedicated backup output and automatic transfer capability Approximately 5–15 kWh of usable storage for essential loads; more may be needed for multi-day outages Accessible equipment location, protected battery environment, and adequate ventilation and clearance Separate essential circuits from high-load circuits. Verify starting currents for pumps, compressors, and motors.
Support electric vehicle charging Vehicle energy use may add approximately 5–15 kWh per 100 km driven Add approximately 2–5 kW of PV capacity for moderate weekly driving, depending on mileage and charging schedule Inverter and charger should be coordinated with the site's service capacity and available daytime solar power Optional; storage can allow charging after sunset but may increase system cost and conversion losses Available roof area, sufficient electrical service, and a practical cable route to the parking location Solar-aware charging can reduce grid purchases. Confirm whether the charger can dynamically follow surplus PV output.
Operate in a remote or weak-grid location Approximately 5–25 kWh per day, depending on water pumping, refrigeration, communications, and tools Approximately 4–15 kW, sized for both average energy use and seasonal solar conditions Off-grid or hybrid inverter with generator integration, battery charging controls, and sufficient surge capacity Typically 1–3 days of usable storage; lithium-based systems commonly use an 80%–90% maximum depth of discharge Unshaded ground or roof area with secure equipment housing and all-season maintenance access Include a backup generator or other source when prolonged cloudy periods are possible. Design for the lowest-sun season.
Use a small apartment or limited roof area Approximately 4–10 kWh per day, often with limited control over major loads Approximately 1–3 kW, depending on available roof, balcony, or shared-array capacity Microinverters or module-level power electronics can help where shading or multiple orientations exist Optional; approximately 3–8 kWh of usable storage may cover evening essentials Confirm structural approval, shading from nearby buildings, orientation, and permission to connect to the electrical system Limited area makes accurate shading analysis important. Check building rules, fire access, metering, and grid-connection requirements.
Optimize performance on a partially shaded roof Any household or small-business load profile Size according to annual energy demand, but expect lower output than an equivalent unshaded array Use multiple MPPT channels, module-level power electronics, or separate array sections for different roof planes Storage does not remove shading losses; size it from actual load timing and backup requirements Detailed shade assessment from nearby trees, chimneys, parapets, and neighboring buildings Even brief shading can affect string output. Trim or remove avoidable shade where practical before final system sizing.
Planning reference: A well-oriented photovoltaic array commonly produces approximately 1,000–1,700 kWh per installed kW per year, depending on location, weather, tilt, orientation, shading, temperature, and system losses. Final sizing should use local solar data, a detailed shade study, the site's hourly load profile, roof or ground structural limits, and applicable electrical regulations.

Estimate Energy Demand and Required Solar Capacity

Designing a reliable solar system starts with measuring energy demand, not choosing panel wattage. Review twelve months of electricity bills, then list major appliances and their daily operating hours. Include refrigerators, pumps, lighting, computers, and standby consumption. Small hidden loads matter.

For example, a home may use 8.4 kilowatt-hours daily. If the site receives 4.5 peak sun hours, divide demand by sunshine and system efficiency. Using an 80% performance factor, the calculation is 8.4 ÷ 4.5 ÷ 0.8, or about 2.33 kilowatts of solar capacity. A practical design may require 2.5 to 3 kilowatts, depending on roof space and seasonal conditions. Solar output changes with heat, dust, shading, and cloudy weather.

The inverter should match expected continuous demand and short starting surges. A pump or compressor can briefly draw much more power than its running rating. Check these figures carefully. In field assessments, I have seen estimates fail because standby loads were ignored. I once treated a shaded roof section as fully productive, which made the forecast too optimistic. Recheck the calculation with winter sunlight, future appliances, and local installation limits. An energy monitor can confirm whether the spreadsheet reflects real household behavior.

Select Compatible Solar Panels and Inverter Types

How to Design the Best Solar Panel and Inverter System?

Select Compatible Solar Panels and Inverter Types

A reliable solar system begins with electrical compatibility, not panel appearance. Match the panels’ operating voltage and current with the inverter’s MPPT range. Check the inverter’s maximum DC voltage before connecting strings. Cold mornings can raise panel voltage beyond the expected level. This detail is easy to miss.

For a roof with strong sunlight and little shade, a string inverter can offer efficient, simple operation. Each string must use panels with similar specifications and orientation. Partial shading may reduce the output of the entire string. Microinverters can suit roofs with several angles, chimneys, or changing shade. They cost more, but they can improve panel-level performance.

I once reviewed a design that used excellent panels with an undersized inverter. The system worked, but midday production was frequently clipped. A modest DC-to-AC ratio can be useful, though excessive oversizing wastes available generation. Leave room for temperature, cable losses, and future expansion. Measure the roof, record shade across different hours, and compare the panel’s Voc, Vmp, Isc, and Imp values with the inverter specifications. Do not rely on nominal wattage alone. A local qualified installer should verify protection devices, grounding, and regional installation requirements before commissioning.

How to Design the Best Solar Panel and Inverter System?

Select compatible solar panels and inverter types by matching the photovoltaic array’s DC capacity with an appropriately sized AC inverter.

These representative system designs use common DC-to-AC sizing ratios of approximately 1.20–1.33. Oversizing the solar array relative to the inverter can improve energy production during mornings, evenings, and low-light conditions, while the inverter’s maximum DC voltage, current, and MPPT operating range must remain compatible with the selected panels.

Match System Components and Size Electrical Connections

Designing the best solar panel and inverter system starts with matching electrical characteristics, not simply adding more panels.

The IEA PVPS Trends in Photovoltaic Applications 2024 report recorded more than 450 GW of new solar capacity worldwide in 2023. That scale makes careful system integration essential. A practical design compares panel voltage, current, temperature coefficients, and inverter operating limits. The coldest expected temperature must not push string voltage above the inverter’s maximum input rating.

A common utility-scale reference is a DC-to-AC ratio near 1.3, used in NREL’s 2024 Annual Technology Baseline. This ratio can improve inverter utilization during weak sunlight, but it is not universal. Roof angle, shading, local climate, and export limits may justify a smaller or larger ratio.

I have seen designs fail in practice because annual energy estimates looked excellent, while midday clipping was ignored. The spreadsheet was correct. The decision was incomplete.

Electrical connections need equal attention. Select conductors using maximum circuit current, ambient temperature, conduit conditions, and allowable voltage drop. Short rooftop runs may tolerate modest losses, while long underground connections need larger conductors. Include properly rated overcurrent protection, disconnects, grounding, and surge protection according to applicable electrical codes.

The U.S. Department of Energy reports that soft costs remain a major part of installed solar prices, so poor layout can increase labor and materials unnecessarily. Keep connections accessible. Label every circuit clearly. A neat diagram can still hide a weak assumption.

Plan Installation, Safety Measures, and Future Expansion

How to Design the Best Solar Panel and Inverter System

A reliable solar system begins with a careful site survey, not a quick equipment list. Measure roof direction, shading, cable routes, and structural capacity. A winter shadow from a nearby tree can reduce output for several hours.

The International Energy Agency’s Renewables 2024 report expects solar photovoltaic power to provide most new renewable capacity through 2030.

That growth makes accurate planning more important. Match inverter capacity with expected panel output, local temperature, and household demand. Oversizing panels slightly can improve production during cloudy periods, but excessive oversizing may increase clipping and cost.

Safety must be designed into the installation.

Keep clear working space around electrical equipment. Use suitable disconnects, grounding, surge protection, and weather-resistant enclosures. Follow local electrical codes and the latest guidance from recognized safety authorities.

The National Renewable Energy Laboratory notes that inspection, commissioning, and documentation support long-term photovoltaic performance.

Label every circuit clearly. Secure cables away from sharp roof edges and standing water. Small details matter.

Tips:

Leave conduit space and roof area for future panels. Ask for an inverter with expansion capacity. Reserve distribution-board capacity, too. Review battery ventilation and fire separation requirements before installation.

Monitor monthly production against the original estimate. If results differ, investigate shading, soiling, or configuration errors. No design is perfect.

I would rather leave measured expansion space than promise impossible future output.

IRENA reported global renewable capacity reached about 3,870 GW in 2023, showing how quickly system standards and expectations are changing. Review the design every few years.

FAQS

What should I review before designing a solar system?

Review twelve months of electricity bills, not one summer statement. Note peak daily use and major loads, such as pumps or kitchen appliances.

How do roof conditions affect system performance?

Record roof direction, pitch, usable area, and nearby shading. A tree shadow at 3 p.m. can reduce output unexpectedly.

Should I repair an old roof before installation?

Yes, inspect the roof’s age and structure beforehand. Replacing panels later can be expensive if repairs become necessary.

How should panel and inverter capacity be matched?

Match inverter capacity with panel output, local temperatures, and household demand. Slight panel oversizing may help during cloudy weather, but excessive oversizing causes clipping.

Why are cable distances important?

Measure distances between the panels, inverter, and electrical panel. Long cable runs can increase energy losses and installation costs.

Which safety features should the installation include?

Include suitable disconnects, grounding, surge protection, and weather-resistant enclosures. Keep cables away from sharp edges and standing water.

How can I prepare for future expansion?

Reserve roof space, conduit capacity, and distribution-board capacity. Choose equipment with expansion capability. Plans can change.

How should system performance be checked after installation?

Compare monthly production with the original estimate. Investigate shading, dust, seasonal changes, or configuration errors when results differ.

What mistakes are easy to make during solar planning?

Designers may underestimate seasonal shadows, weather, household growth, and future energy needs. Exact sizing looks tidy, but it may leave too little flexibility.

Conclusion

Designing an effective solar power system begins with understanding your energy goals, available installation space, sunlight conditions, roof structure, and local climate. To learn how to design a photovoltaic system with solar panels and inverters, first estimate daily and seasonal electricity consumption, then determine the required solar capacity by considering system efficiency, shading, weather variations, and future energy needs. Choose solar panels and inverter types that are electrically compatible and suitable for the intended application, whether it is a grid-connected, hybrid, or independent system.

Next, match the system components carefully, including panel voltage, inverter input range, battery requirements if applicable, wiring, protective devices, and connection capacity. Proper sizing helps improve performance and reduce unnecessary losses. The installation plan should also address grounding, disconnects, ventilation, weather protection, maintenance access, and professional safety procedures. Finally, leave room for future expansion by selecting suitable equipment capacity and designing the layout so additional panels or storage can be integrated efficiently.

Sienna

Sienna

Sienna is a skilled marketing professional with a deep expertise in our company’s core products and services. With a passion for innovation and detail, she plays a pivotal role in crafting insightful blog posts that not only highlight the unique features of our offerings but also provide valuable......