Installing solar mounting systems is a critical step in harnessing solar energy effectively. According to John Smith, a leading expert in renewable energy systems, “Getting the installation right is crucial for optimal performance.” His insight highlights the importance of proper installation techniques.
Understanding how to install solar mounting systems correctly can make a significant difference in energy efficiency and durability. Poor installation can lead to ineffective energy capture and costly repairs. It’s essential to focus on the specifics, such as placement and alignment. Small mistakes can have a big impact on long-term performance.
Emphasizing best practices can help avoid common pitfalls. For instance, choosing the right materials and ensuring secure anchoring are vital steps. Not every installer pays attention to these details. Continuous learning and adaptation in installation methods are key. It’s not always straightforward, but striving for improvement is what leads to success.
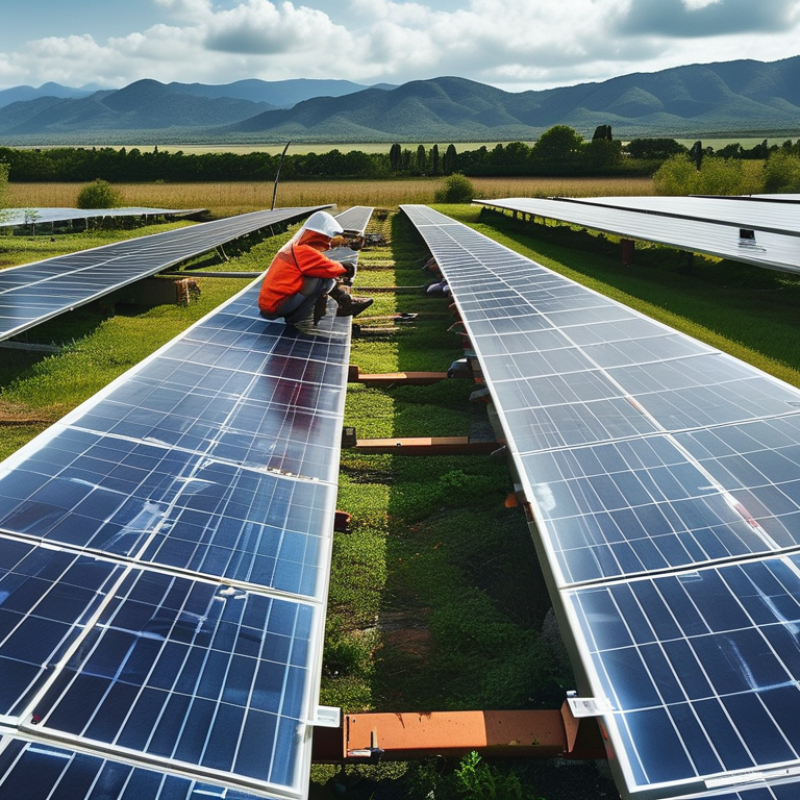
Solar mounting systems play a crucial role in solar panel installations. They provide stability and support, ensuring panels perform optimally. A properly installed system can enhance the efficiency of solar energy capture. Moreover, the right mounting method can extend the lifespan of the panels. Understanding the intricacies of these systems is essential for anyone involved in solar projects.
Proper installation begins with site evaluation. Assess factors like roof type and wind load. This ensures the chosen mounting system is suitable. For instance, using adjustable mounts helps accommodate different angles and conditions. It's also wise to consult local building codes. Compliance can prevent future legal issues and ensure safety.
Regular checks after installation are often overlooked. These inspections can highlight issues before they escalate. Look for signs of wear or instability. Even a slight misalignment can affect energy production. Learning from past installation experiences can lead to better practices. Emphasizing a thorough approach can result in a reliable and efficient solar energy system.
Installing solar mounting systems requires the right tools and equipment to ensure a secure setup. A level is essential to align the panels properly. A tape measure helps with accurate spacing between components. A drill is crucial for fastening parts securely to roofs or ground mounts. Don't overlook safety gear, like gloves and goggles, to protect yourself during installation.
Another important tool is a torque wrench. This ensures that screws and bolts are tightened to the right specifications. Using a multimeter can help verify electrical connections, ensuring everything functions correctly. You might also need a saw to trim mounting rails to size. Each piece of equipment plays its part in a successful installation.
Common mistakes can occur when installers use inappropriate tools or skip essential safety measures. Consider reviewing your process after each installation. Reflecting on what worked and what didn’t can lead to better outcomes in future projects. Take time to adequately gather and check your tools before starting. This preparation can save effort and reduce errors during the mounting process.
| Tip Number | Tip Description | Essential Tools/Equipment |
|---|---|---|
| 1 | Choose the right location with optimal sunlight exposure. | Tape measure, Sunlight meter |
| 2 | Ensure a flat roof surface or install a tilting mechanism. | Leveling tool, Mounting brackets |
| 3 | Use high-quality mounting hardware to withstand weather conditions. | Corrosion-resistant bolts, Washers |
| 4 | Follow local building codes and regulations for installation. | Building code documentation |
| 5 | Securely attach panel mounts to the structure to prevent movement. | Drill, Socket wrench |
| 6 | Install panels at the correct angle to maximize efficiency. | Protractor, Angle finder |
| 7 | Properly connect electrical systems to ensure functionality. | Wire strippers, Electrical connectors |
| 8 | Perform a structural assessment of the mounting surface. | Structural analysis software |
| 9 | Consider shading from trees or buildings and adjust panel placement. | Shade analysis tools |
| 10 | Conduct maintenance checks regularly after installation. | Inspection tools, Cleaning supplies |
When selecting mounting locations for solar systems, several key factors come into play. Sun exposure is paramount. Installers must ensure panels receive optimal sunlight throughout the day. Areas with fewer trees or buildings casting shadows should be prioritized. This is vital for maximizing energy production.
Wind exposure and structural integrity also matter. An area with high wind can stress mounting systems. Adequate anchoring is crucial in such conditions. Soil type is another consideration. Rocky or unstable soil may complicate installation and affect panel stability.
The angle of installation influences efficiency. Ideally, panels should face true south, tilted at an angle that corresponds to local latitude. However, this isn’t always possible. Close attention to local regulations can save headaches later. Installers should also be aware of aesthetic concerns, especially in residential areas. Balancing efficiency with visual impact can be challenging. Each of these factors plays a role in ensuring a successful solar installation.
Installing solar mounting systems requires careful attention to detail. A solid foundation is vital. Begin by assessing your roof's structural integrity. Many roofs lack the strength needed for solar panels. Ensure the surface is sound and able to support the system’s weight. According to industry standards, a roof must withstand up to 60 pounds per square foot.
The next step involves precise measurements. Using a tape measure to mark mounting positions helps avoid misalignment. Even small errors can lead to significant issues later. The Solar Energy Industries Association states that even a 1-degree misalignment can decrease energy efficiency by up to 5%. After marking, install the brackets. Proper torque settings are critical; under-tightening can lead to loose panels, while over-tightening may cause damage. The installation manual provides guidelines for torque specifications.
Finally, consider weatherproofing. Proper sealing around mounting points prevents leaks. A study by the National Renewable Energy Laboratory indicates that improper sealing can lead to water damage, which can be costly. Many installers overlook this step, resulting in future repairs. Careful attention to each aspect can enhance both the durability and efficiency of your solar installation.
When installing solar mounting systems, safety standards play a crucial role. Proper alignment ensures effective energy capture and prevents structural failures. Evaluating the site thoroughly can reveal potential hazards, such as overhead power lines or weak ground. Each installation requires specific tools. Not using the right tools can cause serious injuries or damage.
Understanding local guidelines is essential. Many areas have unique regulations for solar installations. Ignoring these can lead to costly penalties. It is also vital to check for additional permits or inspections. These steps help ensure compliance while maintaining safety.
Additionally, training is key. Ensure all team members are familiar with best practices. Mistakes in installation can lead to dangerous situations or inverter issues. Conducting regular safety meetings can reinforce awareness. Documenting safety protocols creates accountability and improves outcomes. Regular reflection on previous projects might reveal improvement areas, enhancing future installations.
: They provide stability and support for solar panels, enhancing energy capture and lifespan.
It's crucial. Assess roof type, wind load, and local codes to ensure proper system selection.
Sun exposure, wind, soil type, and installation angle are key factors for optimal energy production.
Look for signs of wear, misalignment, or instability that could affect energy production.
Even a 1-degree misalignment can decrease efficiency by 5%, highlighting the need for precision.
Proper sealing prevents leaks and water damage, which can be costly and is often overlooked.
A roof should withstand up to 60 pounds per square foot for safe installation.
Under-tightening causes loose panels, and over-tightening can lead to damage. Both are problematic.
Balancing efficiency with visual impact can be challenging and affects overall satisfaction.
It leads to improved practices and helps avoid repeating mistakes that could compromise efficiency.
Installing solar mounting systems correctly is crucial for the efficient operation of solar panels. Understanding the different types of mounting systems and their significance plays a vital role in ensuring a successful installation. Before beginning the process, it's essential to gather the necessary tools and equipment tailored for proper mounting. Additionally, factors such as geographical location, roof structure, and solar exposure should be carefully considered when selecting mounting locations.
The installation process involves several key steps, including securing the mounts, aligning the panels, and ensuring optimal angles for sun exposure. Adhering to safety standards and best practices throughout the installation is imperative to protect both the installer and the system. Overall, mastering how to install solar mounting systems correctly can significantly enhance the performance and longevity of solar energy systems.

Stuart Solar